Installation
Prerequisites
This plugin needs uv installed on your machine.
To check if it is installed open Command Prompt (on Windows) or Terminal (on macOS) and run the command
uv --version
If you get a valid output with the version, you’re all set.
![]()
Otherwise run the below command to install uv:
-
Windows
Open Terminal / Command Prompt and run:
powershell -ExecutionPolicy ByPass -c "irm https://astral.sh/uv/install.ps1 | iex" -
macOS / Linux
Open Terminal and run:
curl -LsSf https://astral.sh/uv/install.sh | sh
Now check once again using the uv --version command to see if it was successfully installed.
For detailing uv installation see the UV Installation Guide :
The are 2 main steps in installing this plugin:
- Install in your Godot project
- Install in your MCP Client eg. Cursor, Windsurf, VSCode, etc
1. Install in Godot project
This is a normal plugin for Godot. To install it follow these steps:
-
Close the Godot Editor.
-
Download the latest version of the plugin (zip file) and extract it. You will get an
addonsfolder and inside that there will begdai-mcp-plugin-godotfolder.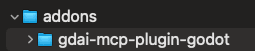
-
Copy the
addons/gdai-mcp-plugin-godot/from the extracted zip tores://addons/of your Godot project.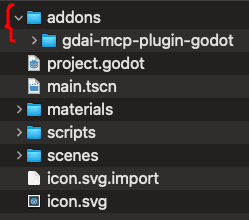
-
Now open the project in Godot editor, goto
Project -> Project Settings -> Pluginsand enable theGDAI MCPplugin.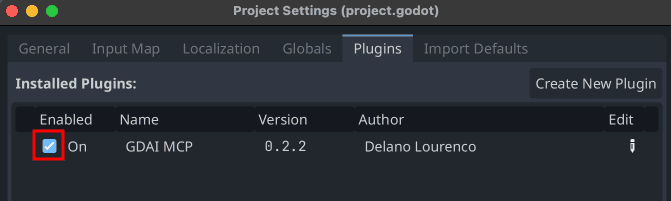
Note: On macOS, you might get a popup saying Apple could not verify the libgdai-mcp-plugin-godot.template_release.dylib. Follow this guide to resolve this issue: macOS - Apple could not verify “libgdai-mcp-plugin-godot.macos.template_release.dylib”
-
You should see a
GDAI MCPtab in the bottom panel of the Editor.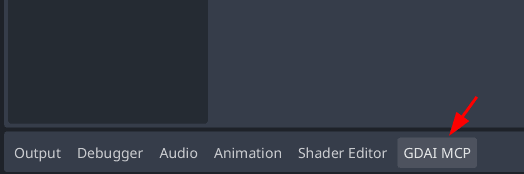
-
In the
GDAI MCPtab, you can:- Start/Stop the MCP server
- Check for plugin updates
- Find quick links to the Plugin Website, and Docs.
- The JSON config which you will need to setup the server in a MCP Client is also shown. Copy the JSON for later use.

-
Now you can proceed to install the MCP server in your MCP client.
Before exporting your game make sure to follow the steps in the Exporting section.
Recommended Godot Editor Settings
-
In Godot Editor, click the
Editortab at the top, thenEditor Settings, make sure to enable theAuto Reload Scripts on External ChangeandAuto Reload and Parse Scripts on Saveoptions. If you don’t see this options, make sure to enableAdvanced Settingsin the top right.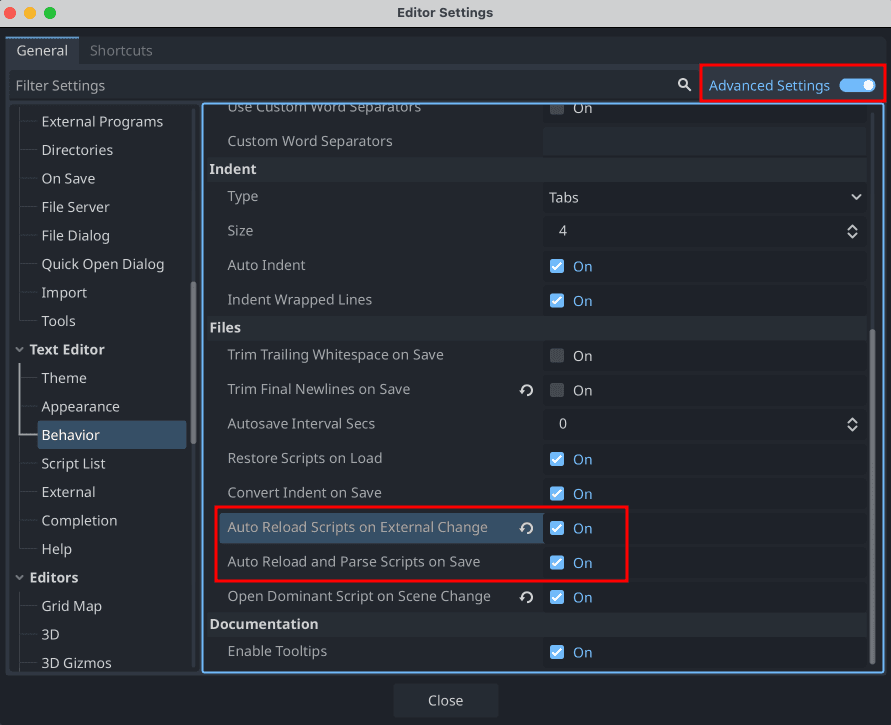
2. Install in MCP Client
Installation may be slightly different based on which MCP Client you are using. Installation steps for some of the popular MCP Clients is given below:
Claude Desktop
For installing in Claude Desktop:
-
Open Claude Desktop, and goto the Settings.
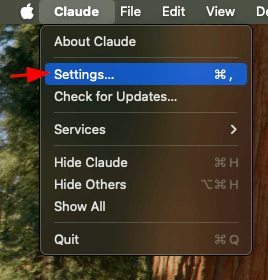
-
Then click on
Developer, and then click onEdit Config. Then also close Claude Desktop app.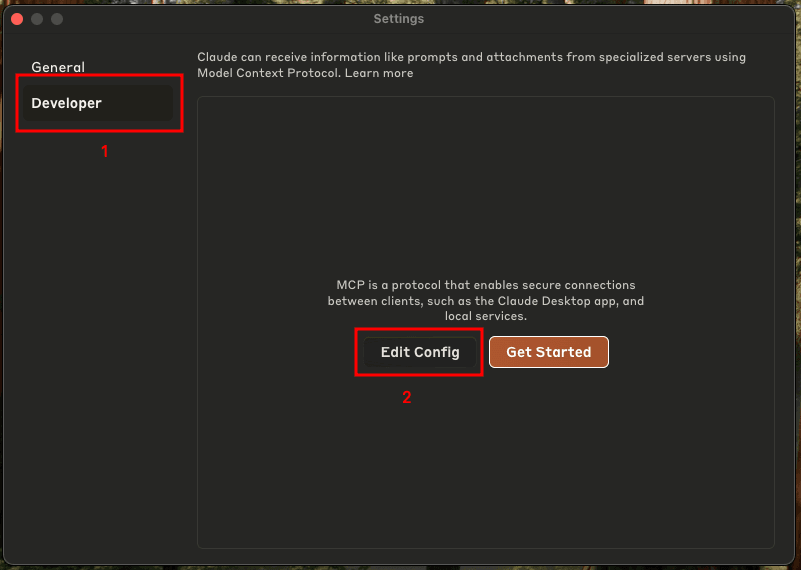
-
If you don’t have any MCP servers setup before, you will see the below JSON file.
{ "mcpServers": {} } -
Update the JSON file as follows (What you copied earlier from the
GDAI MCPtab in Godot):{ "mcpServers": { "godot-mcp": { "command": "uv", "args": ["run", "/absolute/path/to/addons/gdai-mcp-plugin-godot/gdai_mcp_server.py"] } } }You can name
godot-mcpto whatever you want likemy-awesome-game-godot-mcp. -
Now open Claude Desktop, and you should see the MCP server as shown in the screenshot below:
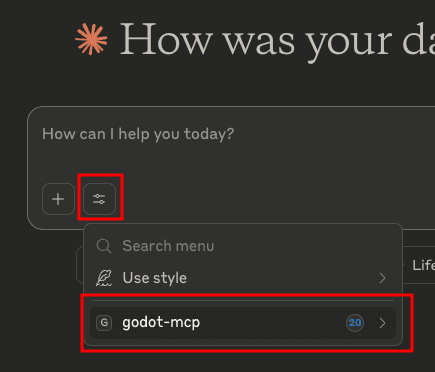
-
You can now chat and start letting AI automate your Godot workflows.
Claude Code
For installing in Claude Code simply run the command:
claude mcp add gdai-mcp uv run path-shown-in-gdai-mcp-tabEg.
claude mcp add gdai-mcp uv run /absolute/path/to/addons/gdai-mcp-plugin-godot/gdai_mcp_server.pyCodex
For installing in Codex simply run the command:
codex mcp add godot-mcp -- uv run path-shown-in-gdai-mcp-tabEg.
codex mcp add godot-mcp -- uv run /absolute/path/to/addons/gdai-mcp-plugin-godot/gdai_mcp_server.pyCursor
-
Open Cursor, and goto Cursor Settings.
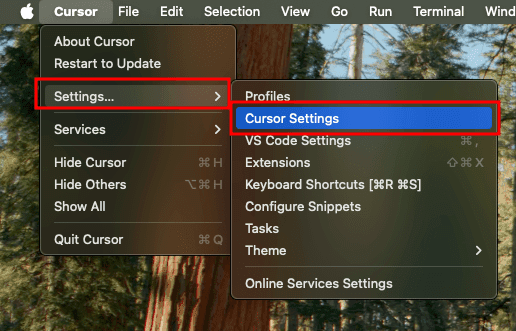
-
Then click the
MCPtab, and then clickAdd new global MCP server.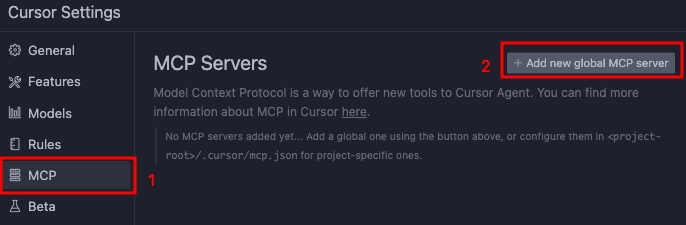
-
Now in the text editor that opens, paste the same JSON config which you got from the
GDAI MCPtab in Godot.
-
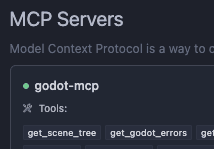
You should then see the server in Cursor.
-
You can now chat and start letting AI automate your Godot workflows.
Windsurf
-
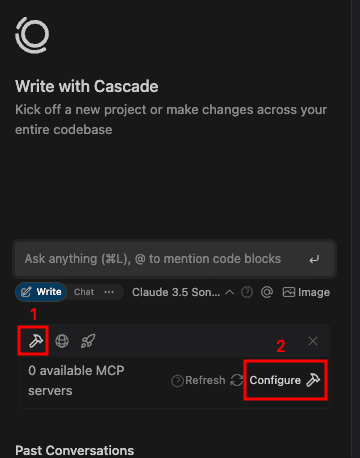
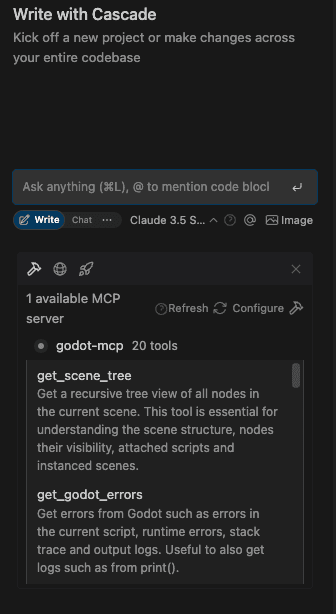
Open Windsurf, and goto the
Cascadesection. -
Then click the small Hammer icon (1) and then click the Configure button (2) as shown in the screenshot below:
-
Now in the text editor that opens, paste the same JSON config which you got from the
GDAI MCPtab in Godot.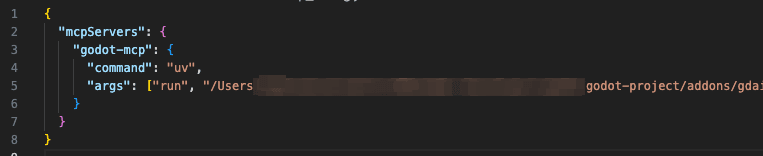
-
You should then see the server in Windsurf.
-
You can now chat and start letting AI automate your Godot workflows.
VS Code Copilot
-
Open your project in VS Code
-
Create a folder
.vscodeif it doesnt exist at the project root. -
Create a file
mcp.jsoninside the.vscodefolder.
-
In the
mcp.jsonfile paste the same JSON config which you got from the GDAI MCP tab in Godot. Make sure to replace the wordmcpServerswith justservers. See the below image.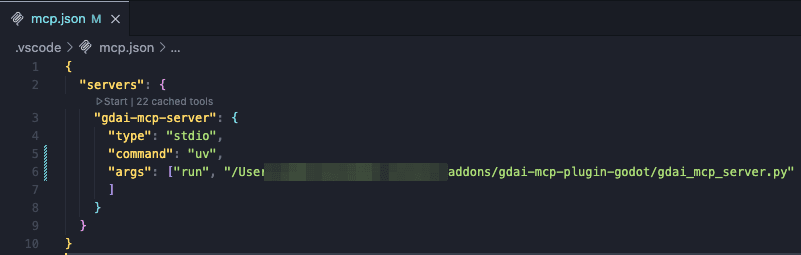
-
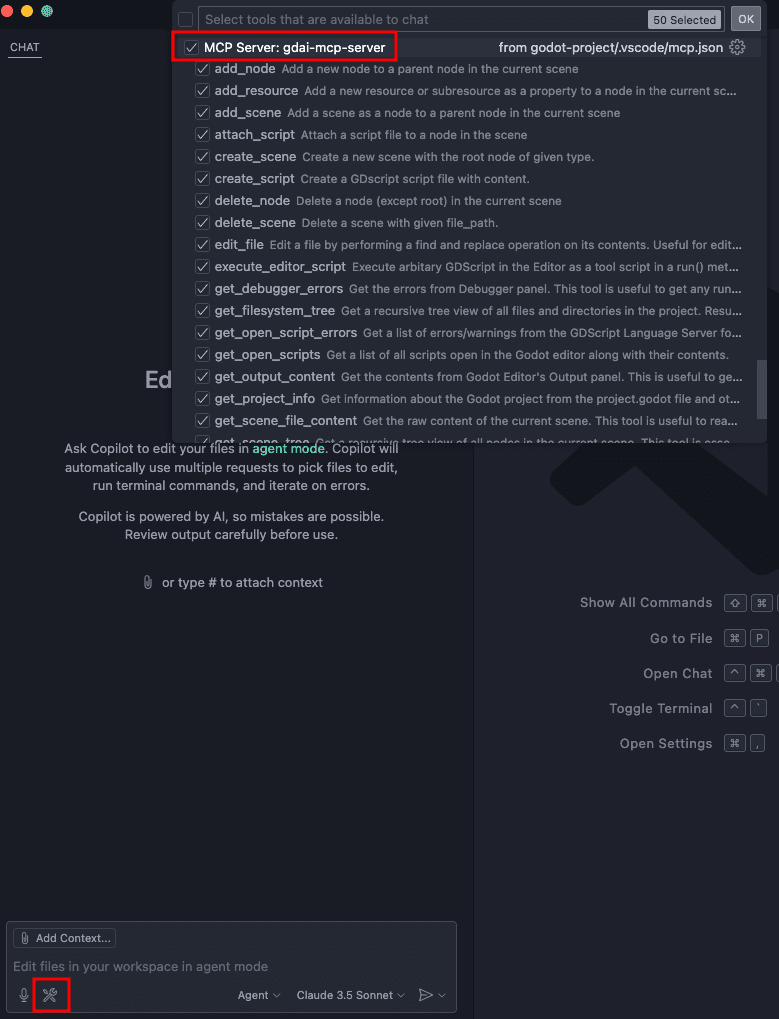
Restart VSCode, and you should see the GDAI MCP server, in the MCP servers list by clicking the wrench icon in the bottom chat area.
-
You can now chat and start letting AI automate your Godot workflows.
Antigravity
-
Open your project in Antigravity.
-
Then click the
3 dotsbutton next to the close sidebar button, and then clickMCP Servers.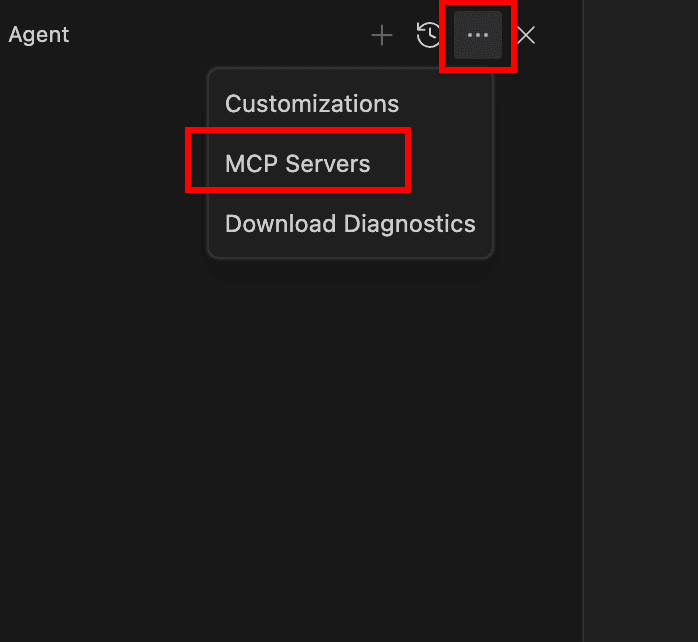
-
Then click
Manage MCP Serversbutton.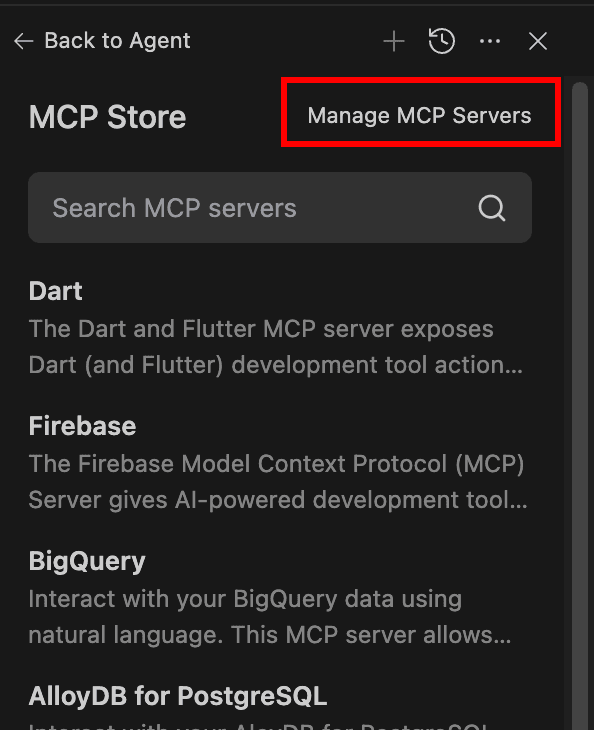
-
Then click
View raw configbutton.
-
Then paste the same JSON config which you got from the
GDAI MCPtab in Godot.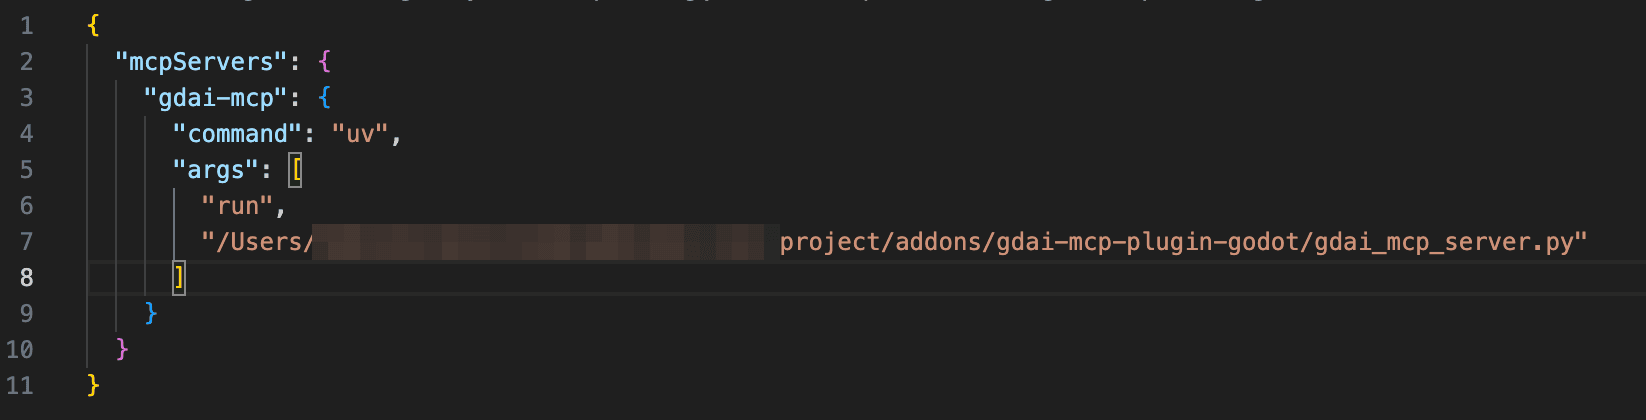
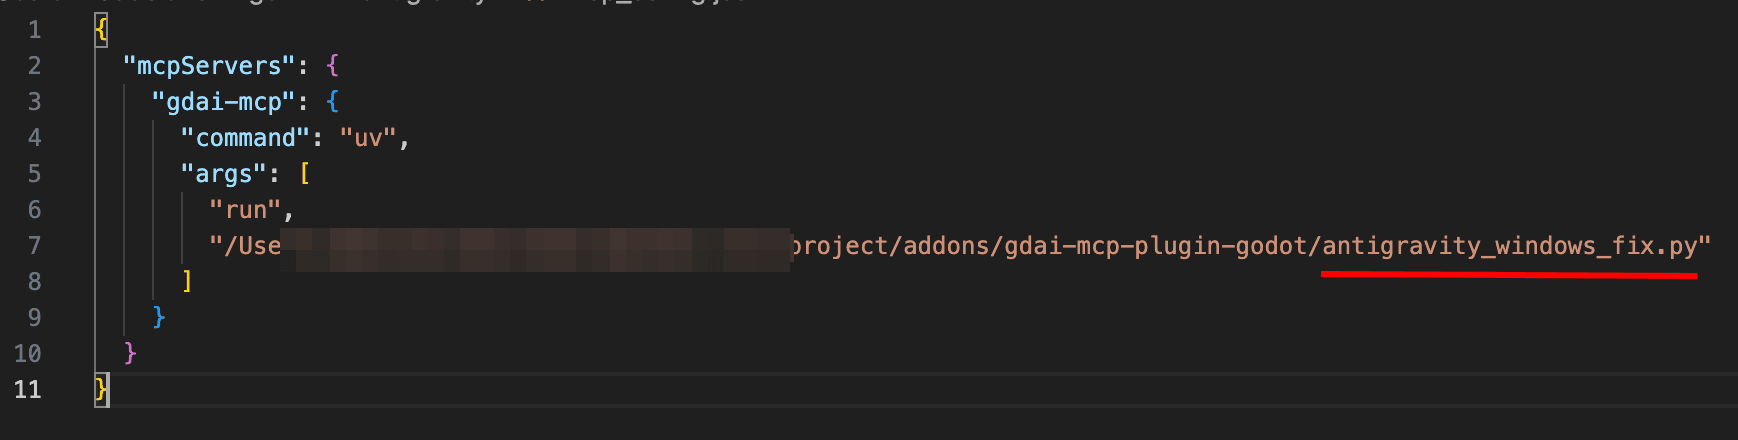
Antigravity Windows Fix
If you’re on Windows, the mcp server will not directly work on Antigravity due to stricter rules. As a workaround, in the MCP server JSON config replace the gdai_mcp_server.py with antigravity_windows_fix.py
Installation instructions not found for my IDE / MCP client
If the MCP server installation instructions are not mentioned for your IDE or MCP client, please contact 3ddelano in the Discord server .
3. Try it out
Once you have installed both in Godot and in your MCP client. Make sure that your project is open in the Godot Editor. Then you start chatting about your project and ask the AI to work on the project.
Next steps: